VanMoof e-Shifter Overview
The VanMoof eShifter is an electronic gear-shifting component used in models such as the S2, X2, S3, X3, S5, and A5. It works in tandem with the bike’s Smart Cartridge to manage automatic or semi-automatic gear shifts.
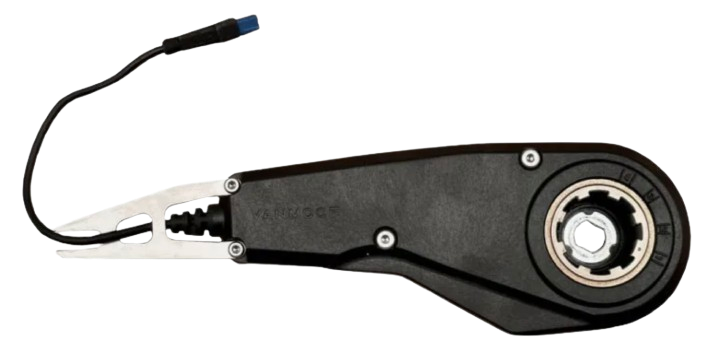
🔧 What Is the eShifter?
The eShifter replaces traditional mechanical gear shifting. It sends signals to an internal gear hub, allowing smooth, automatic gear changes. On newer models, it’s typically controlled through integrated handlebar buttons and works seamlessly with torque and cadence sensors.
⚠️ Common Issues
- Error 44: “Cannot find eShifter.” Possible causes:
- Faulty eShifter (e.g. a water damage)
- Damaged or loose cable between eShifter and SC
- Faulty Smart Cartridge
- Rear Hub. e-Shifter premature failure is not due to a design flaw. Instead, the root cause is often a poorly serviced or worn rear hub. (more details can be found here, Rear Hub essential servicing can be found here)
- Cable Damage: Wires can be pinched or broken during improper handling of the Main Battery or SmartCartridge.
- Water Ingress: May cause corrosion or electrical shorts in connectors.
- Incorrect washer alignment: the rear hub failure can cause eShifter’s washer movement (how to fix can be found here)
Troubleshooting Tips
- Visually inspect the cable for disconnection or damage.
- Test with a working e-Shifter (if available).
- Check for errors using the VanMoof app.
- Use a multimeter to verify continuity in the Wiring Harness (advanced).
Types of e-Shifters
- Original
- Original (Improved)
- Redesigned
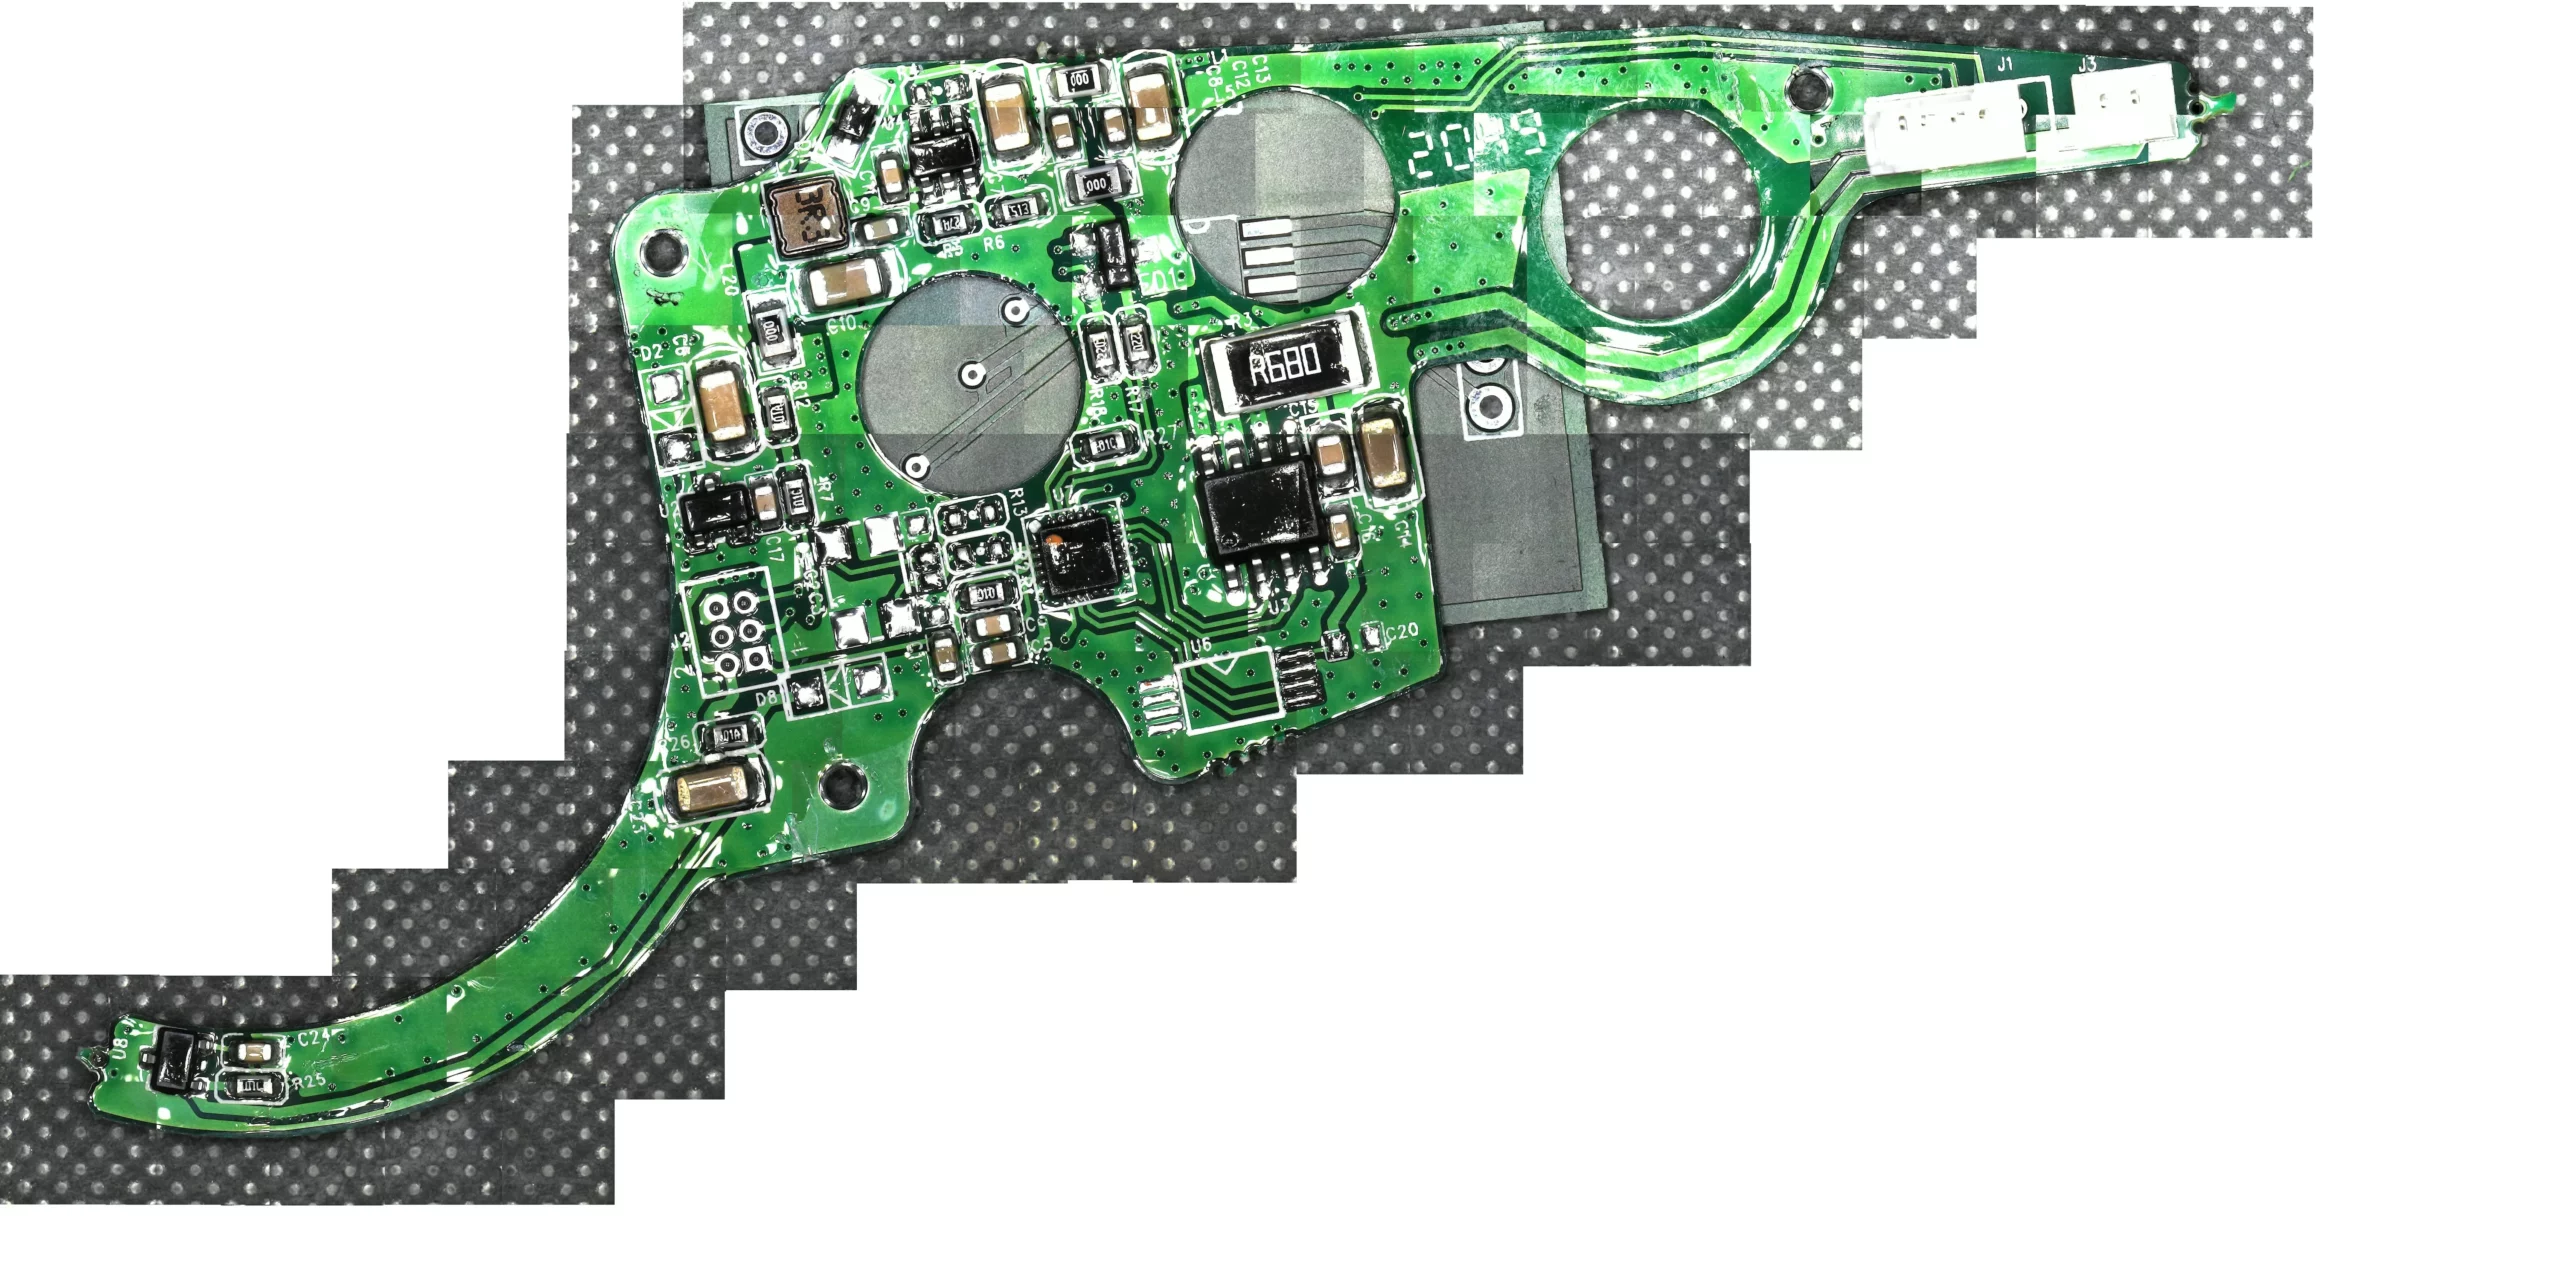
Types of e-Shifter PCBs
- Original
- Original (Improved)
- Redesigned
e-Shifter Spoofers
Tools needed to replace e-Shifter PCB
⚠️ Don’t use any bike grease to lubricate any internal parts of the e-Shifter – it will damage the PCB.
VANMOOF X3 S3 E-Shifter Repair Kit. Coating, Lubricating, Sealing. Syringes – one kit is enough to replace several e-Shifter PCBs. The same can be purchased separately:
- Waterproof PCB protection: silicone conformal coating (e.g. URETHAN 71, 422C)
- Waterproof case seal: any rubber or silicone adhesive (e.g. DOW CORNING 791, Poly Max Crystal Express)
- Waterproof seal. Cassette Joint / Pulley Adaptor: high quality not dry out silicone (e.g. Arctic Hayes)
- Gear lubrication: Teflon PTFE Lubricant or mineral-based oil (e.g. Innotec Hi-Tef Oil, Liqui Moly SAE 30)
- Motor shaft gear lubrication: Lithium PTFE Lubricant (e.g. LM 47)
Replacement parts
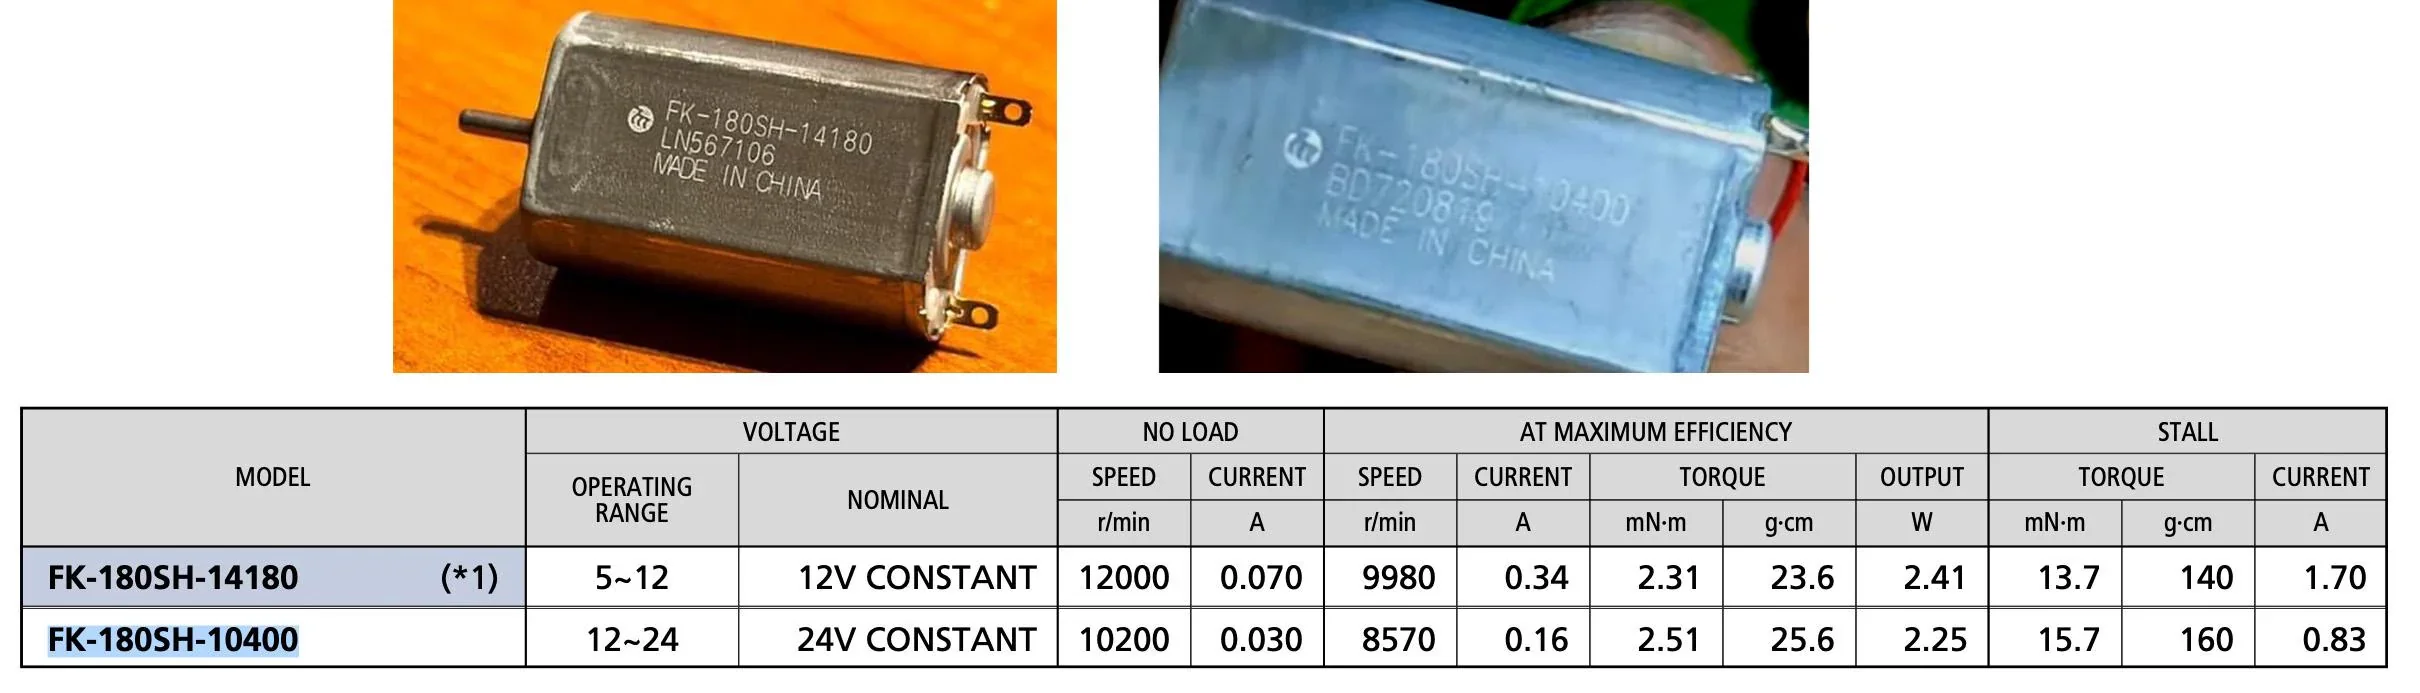
- Motor: FK-180SH-14180 LN567106
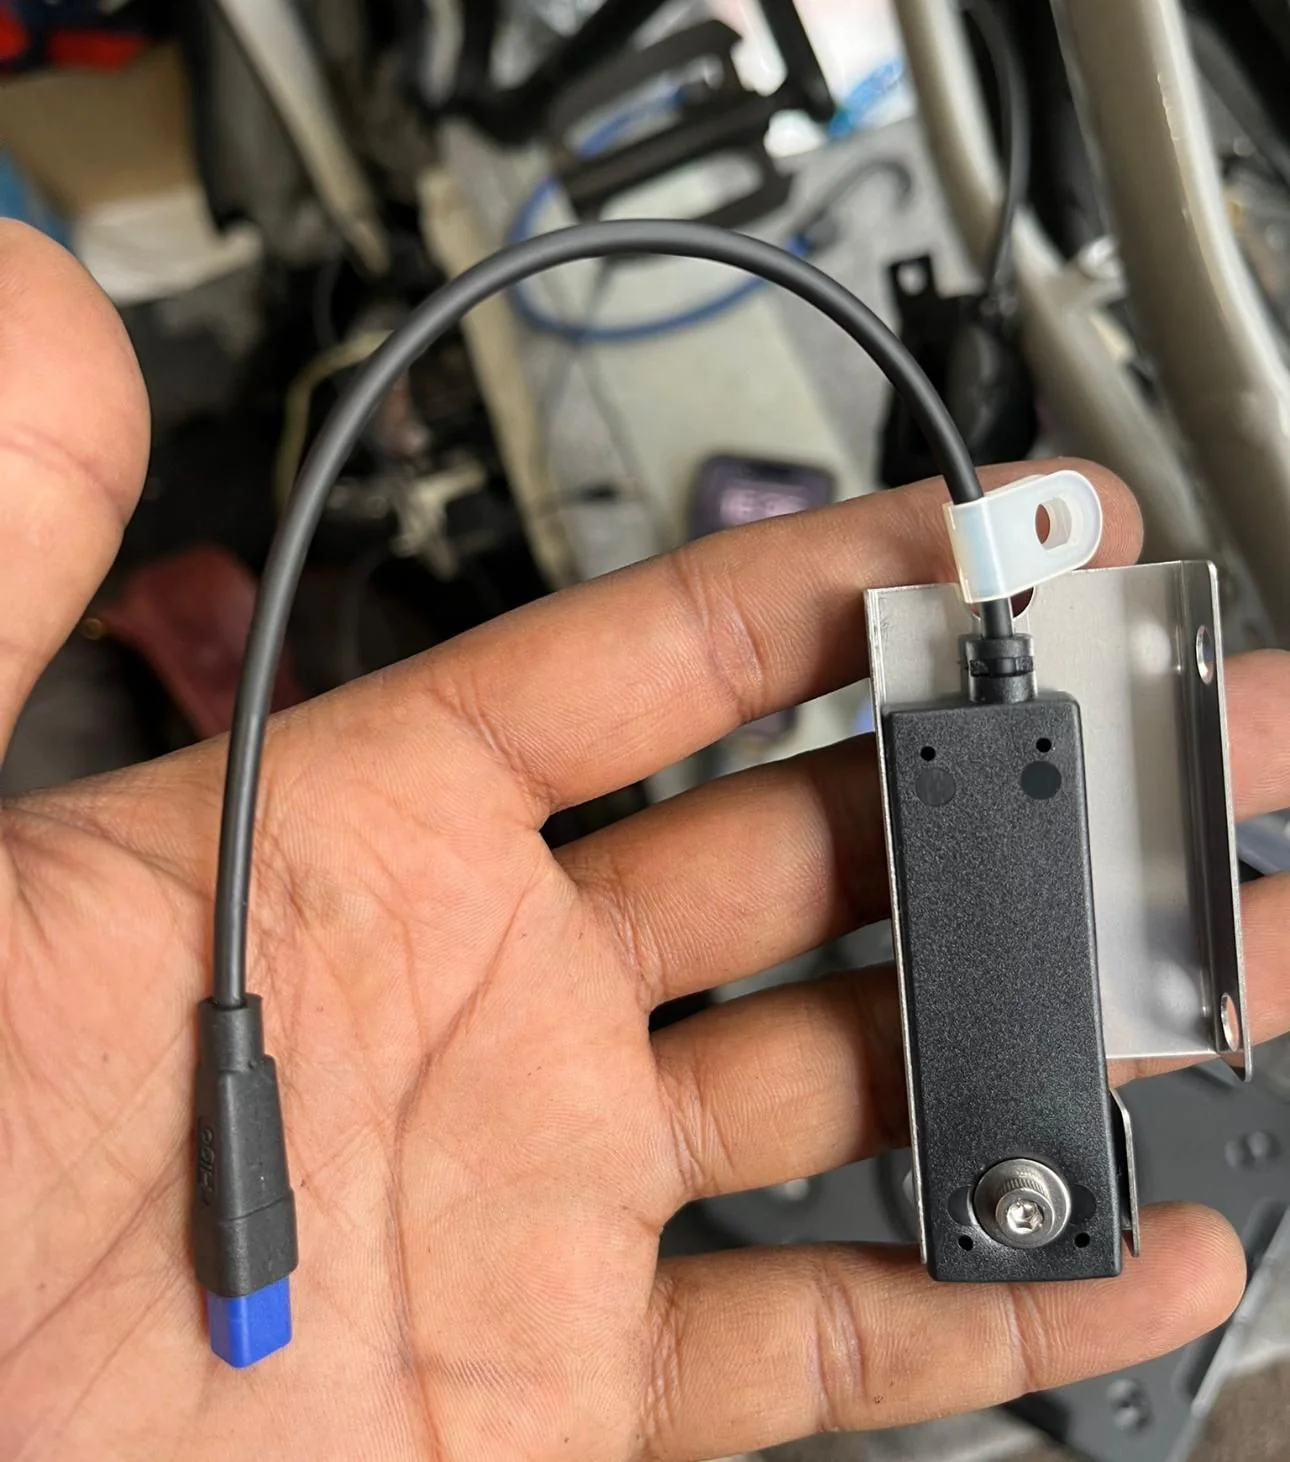
- Cable: Higo Z409FM, Z409FG
Schematics
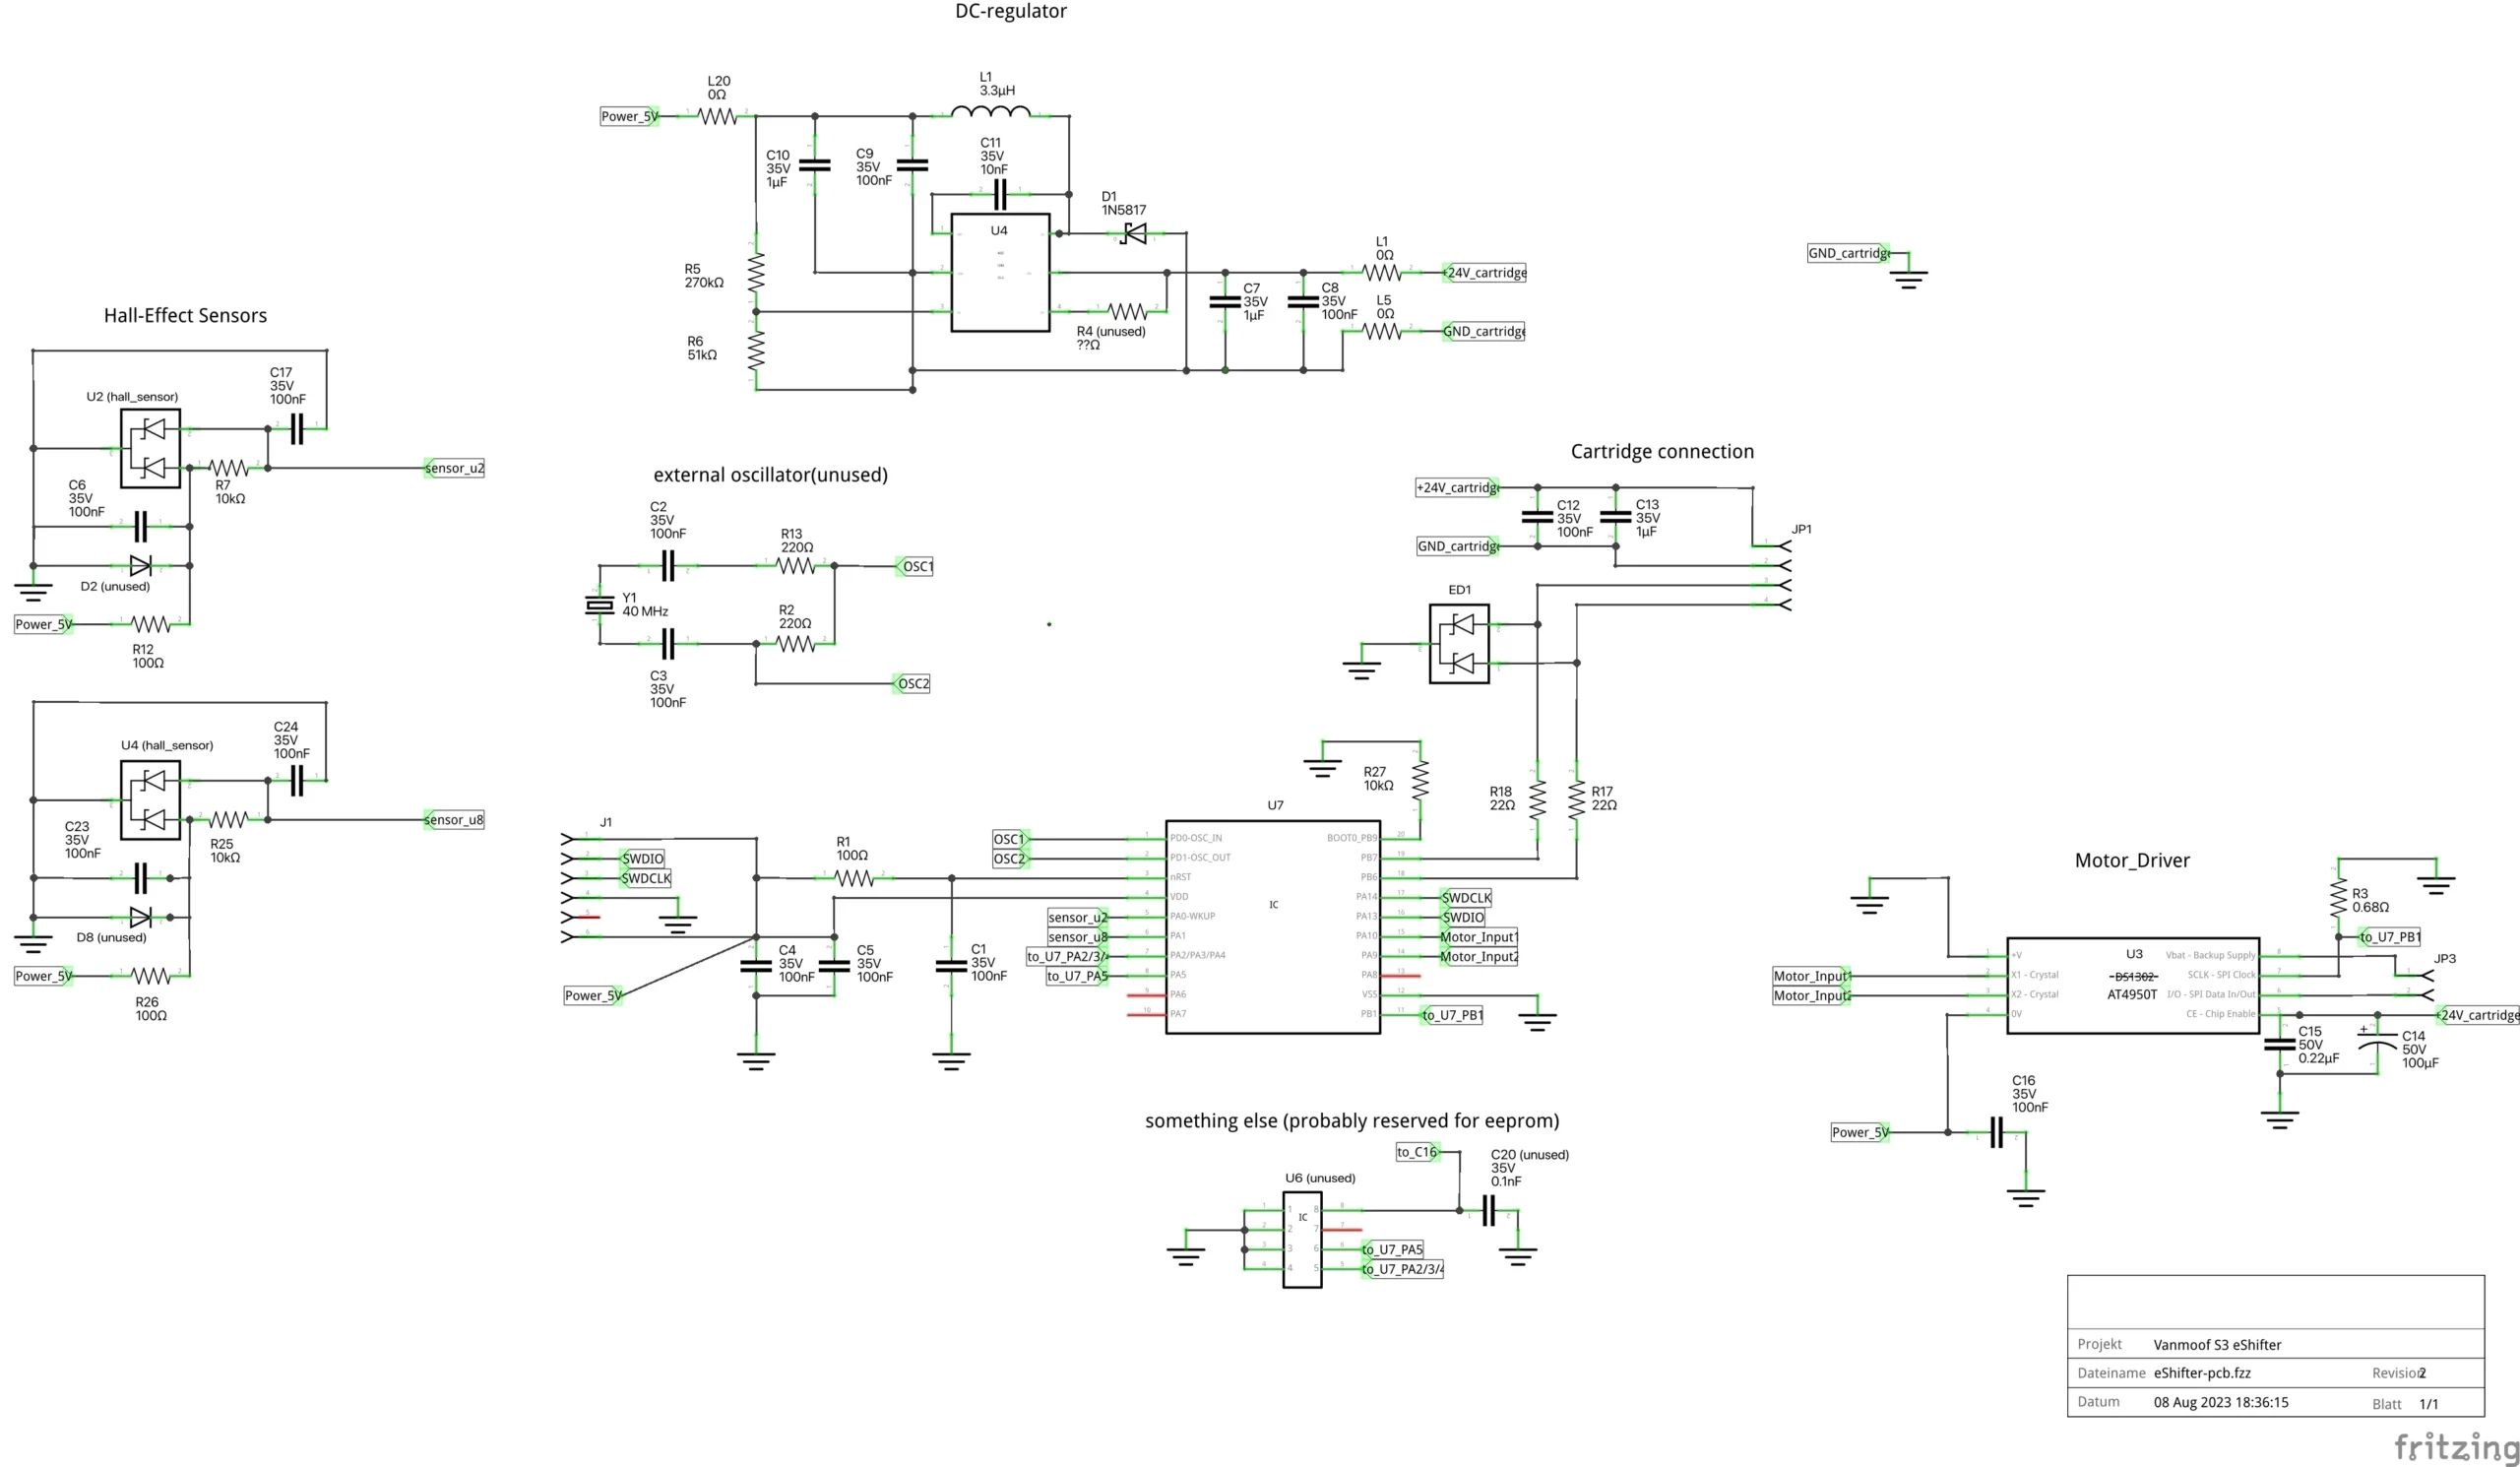
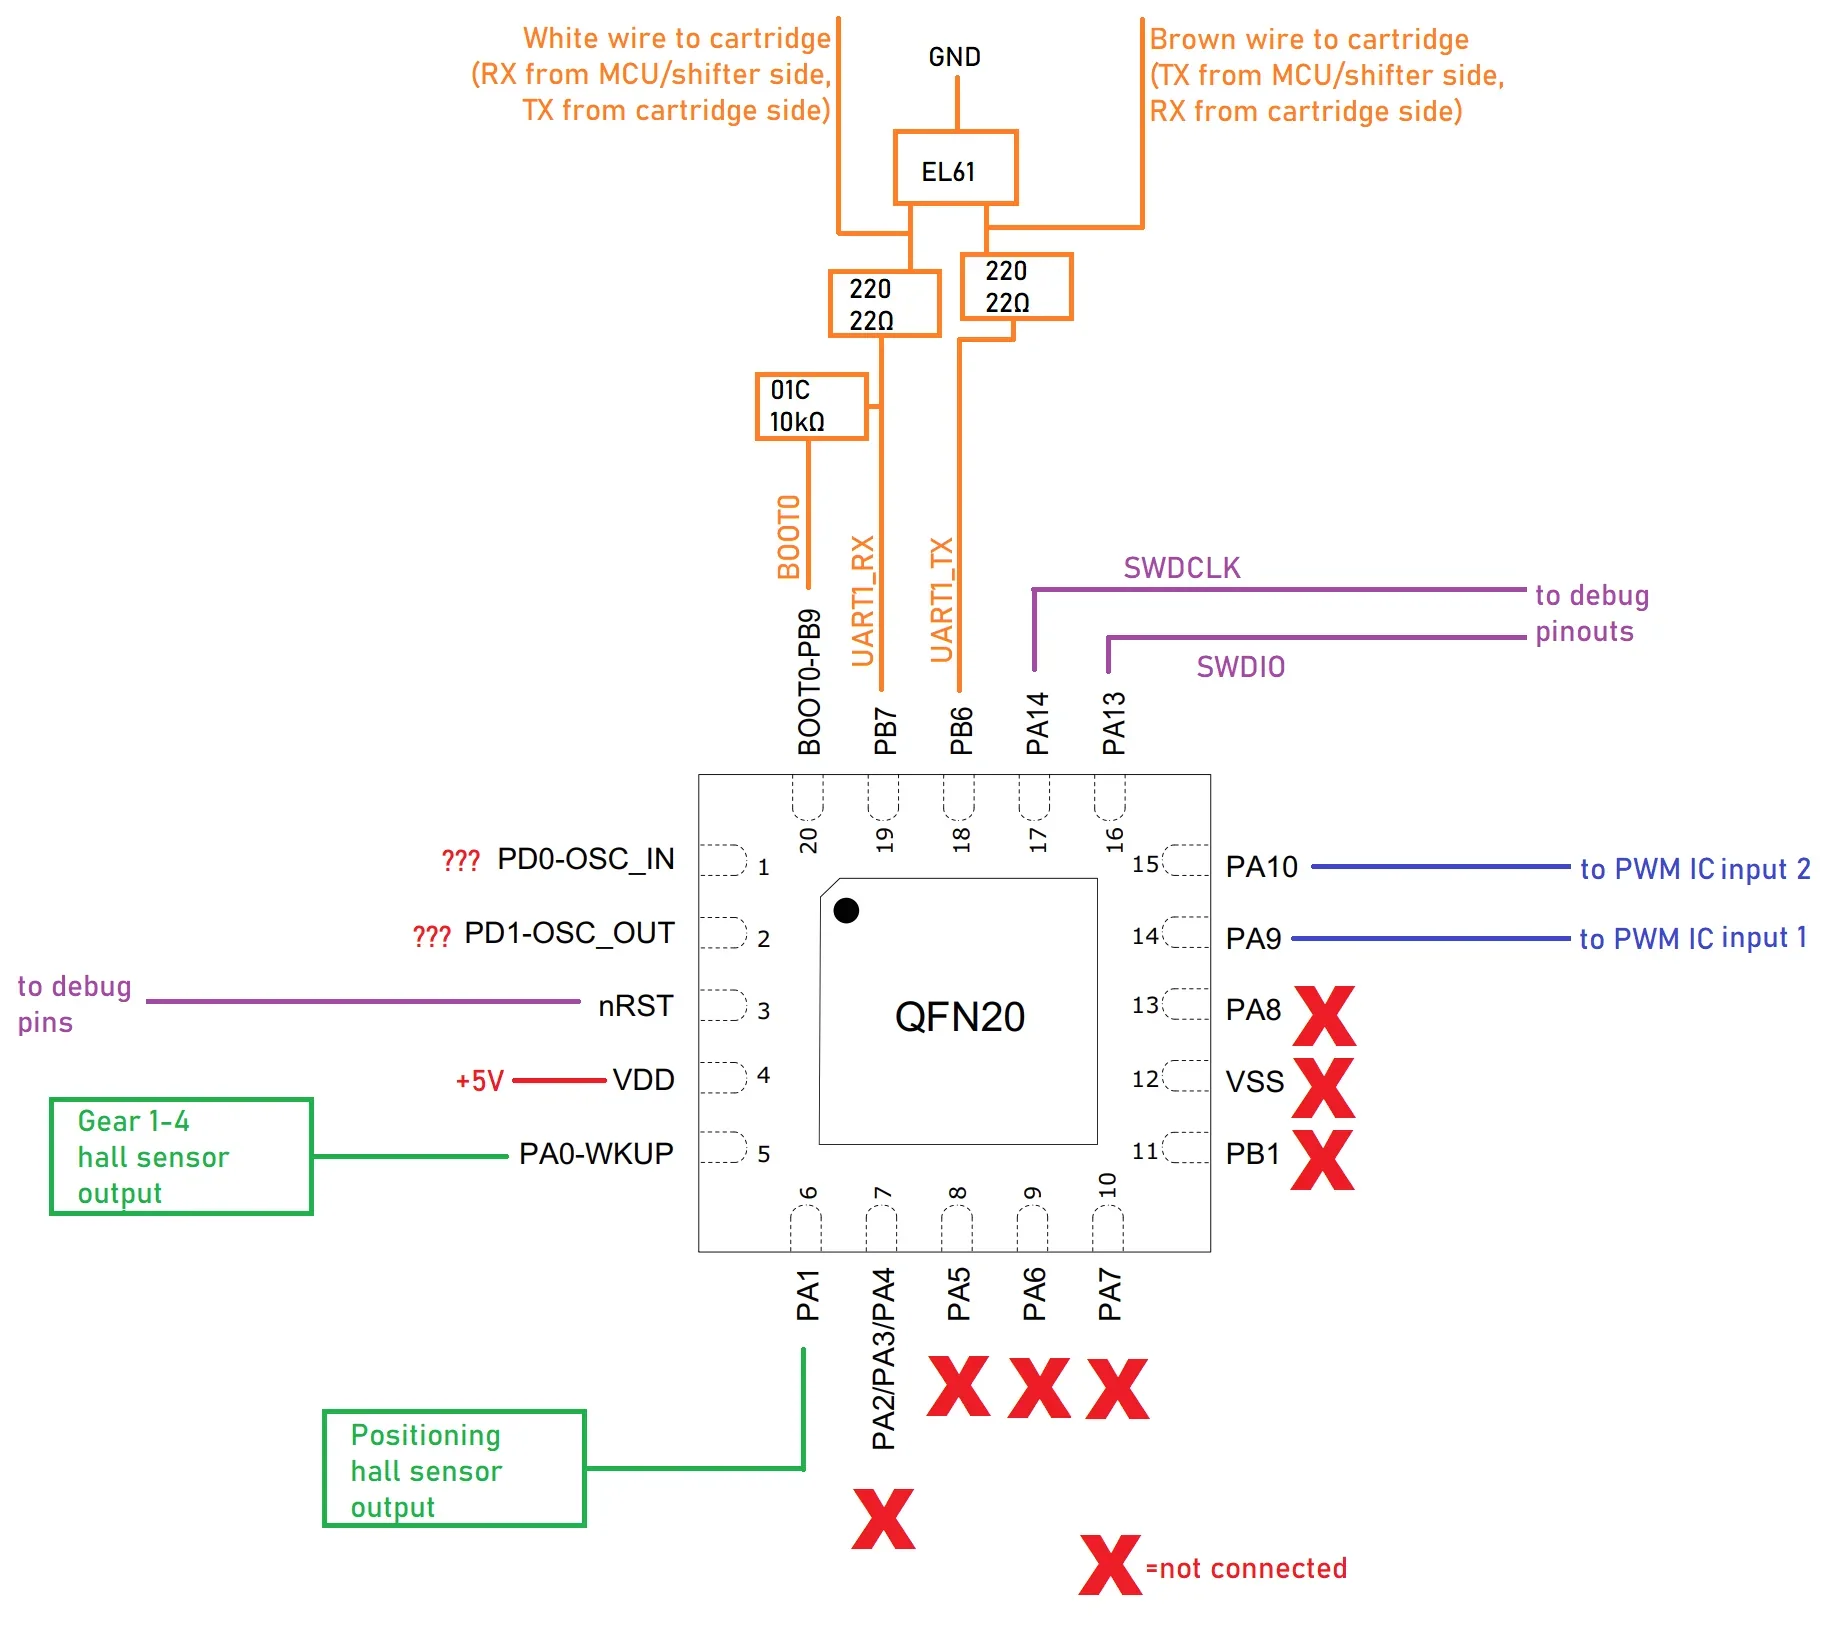
Removing and installing e-Shifter materials
Please watch the following video manuals:
- How to remove the rear wheel (Download Link)
- How to replace the E-shifter (Download Link)
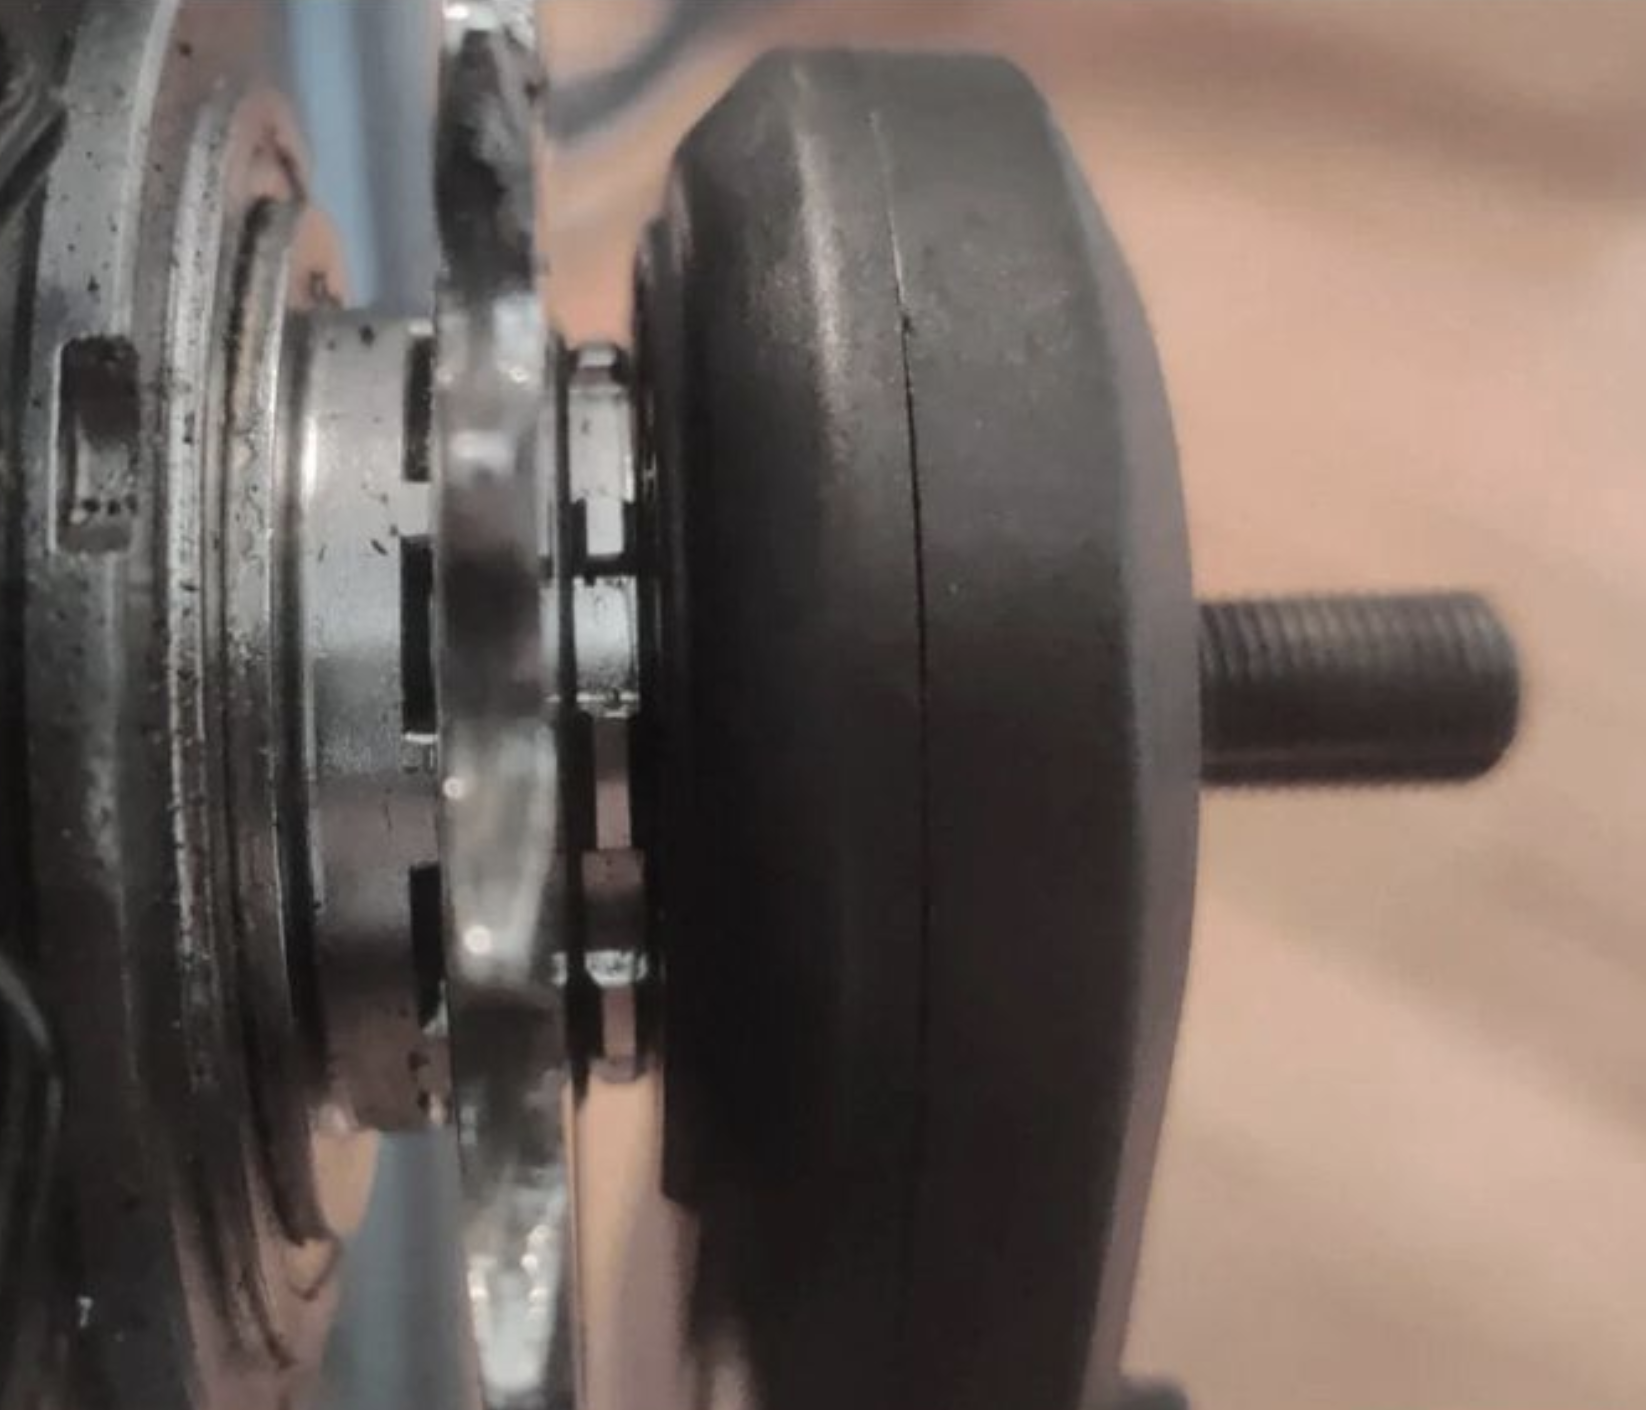
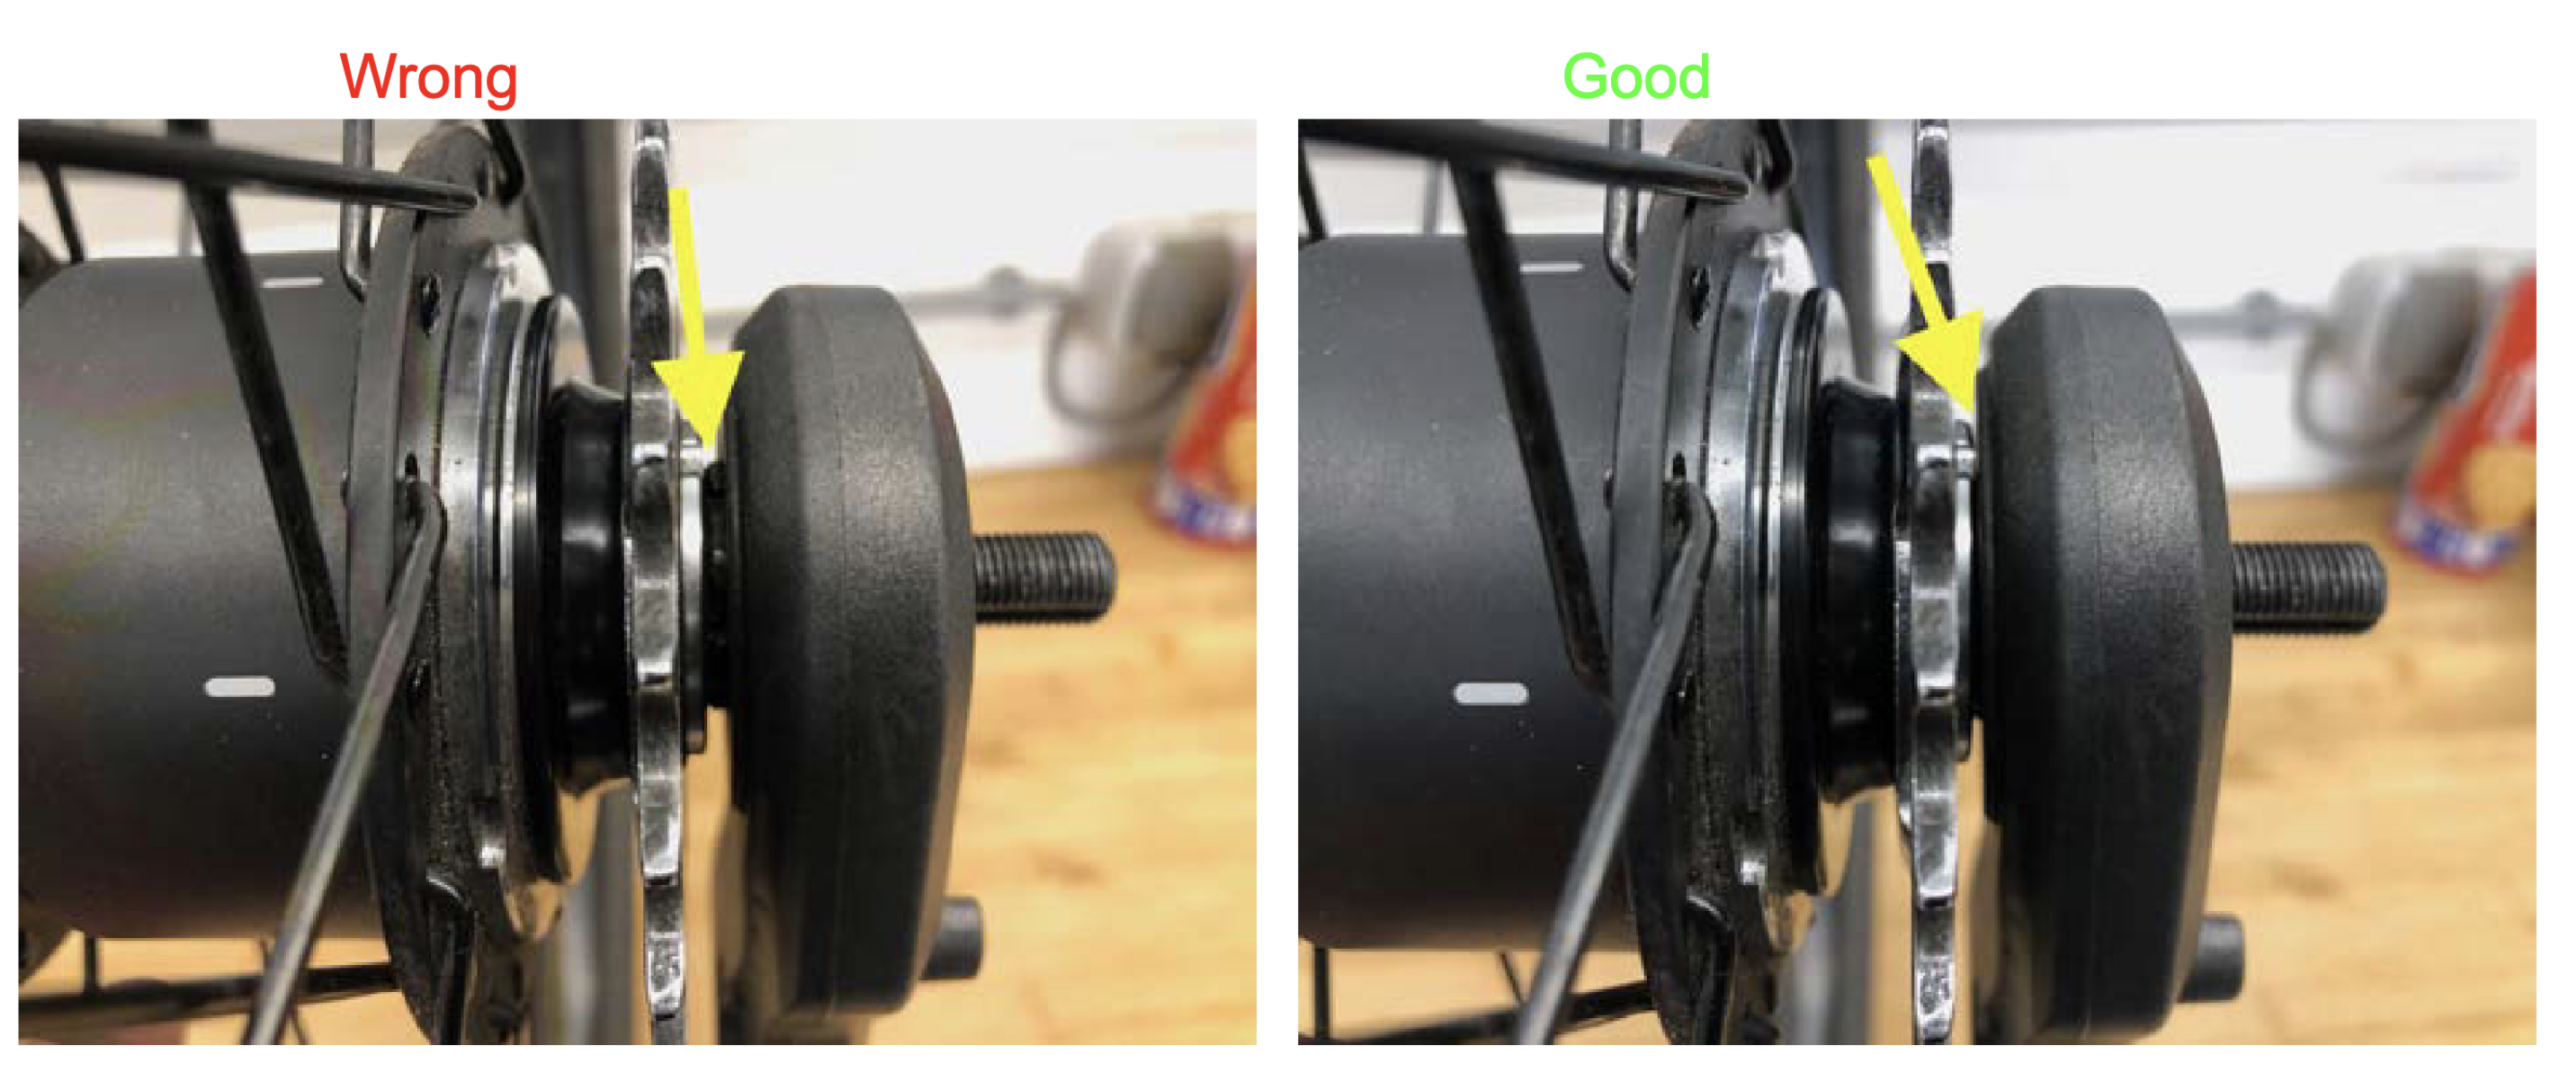
Important note: the alignment part of the video is important but please also test your e-Shifter by rotating the front wheel while the bike is on and the e-Shifter is connected. As soon as you reach 7mph the e-Shifter should automatically switch to 1st gear. If it doesn’t this suggests a problem with the e-Shifter or the bike’s communication logic. The most challenging part is attaching the e-Shifter to the wheel. In most cases, it aligned incorrectly. Slide the e-Shifter onto the axle. Triple-check that the shifter is properly aligned; the e-Shifter must seat flat (Wrong vs Good). When the e-Shifter finds the correct positioning you’ll hear a click. If not, DO NOT fit the nut that holds the shifter onto the axle; this will break the casing of the e-Shifter. - How to attach the rear wheel (Download Link)
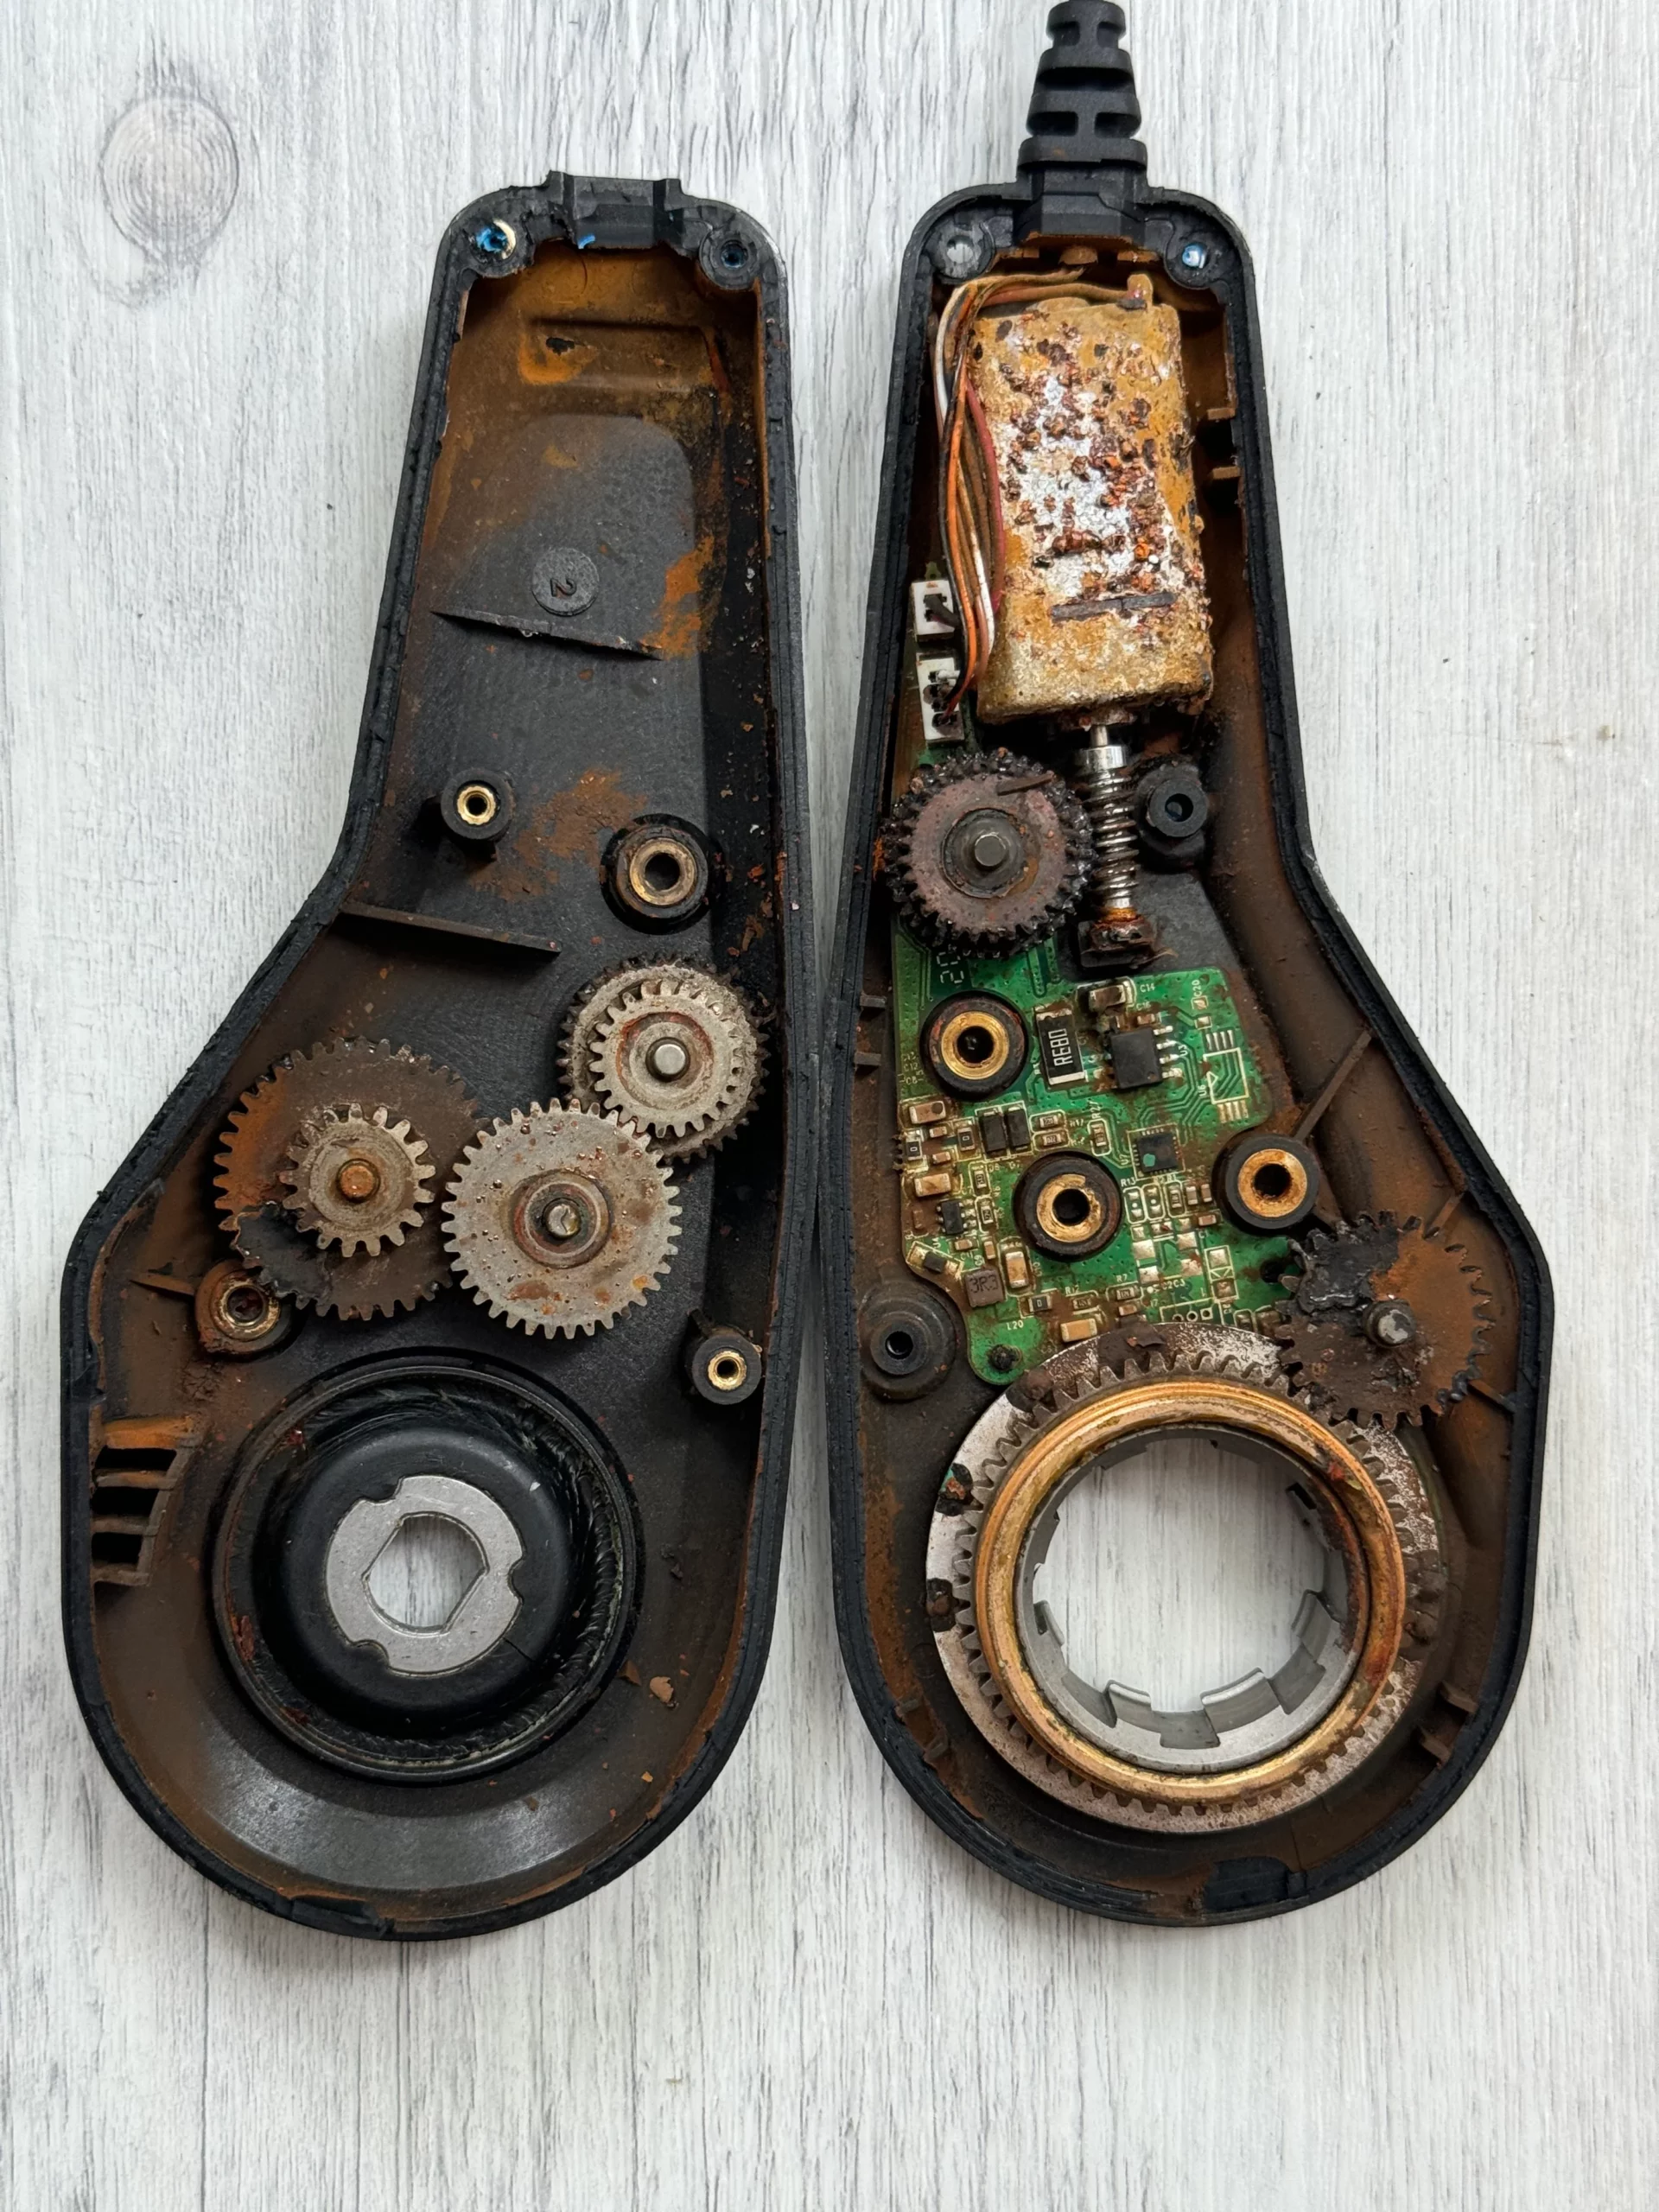
General Steps to Open e-Shifter
- Using a 2mm Allen key, remove the four screws of the e-Shifter.
- Gently pry open the case using a plastic prying tool (spudger).
- Remove the gears and gently remove the PCB (circuit board).
- Disconnect the PCB plugs and clean the old gasket on both sides of the casing.
- If the case is cracked: cut a piece of stainless steel mesh to bridge the crack, then use a heat source to melt the mesh into the plastic, ensuring it is fully embedded. Finally, melt additional plastic over the mesh to create a smooth, strong repair.
Good to know
- Don’t over-tighten the eShifter during the installation.
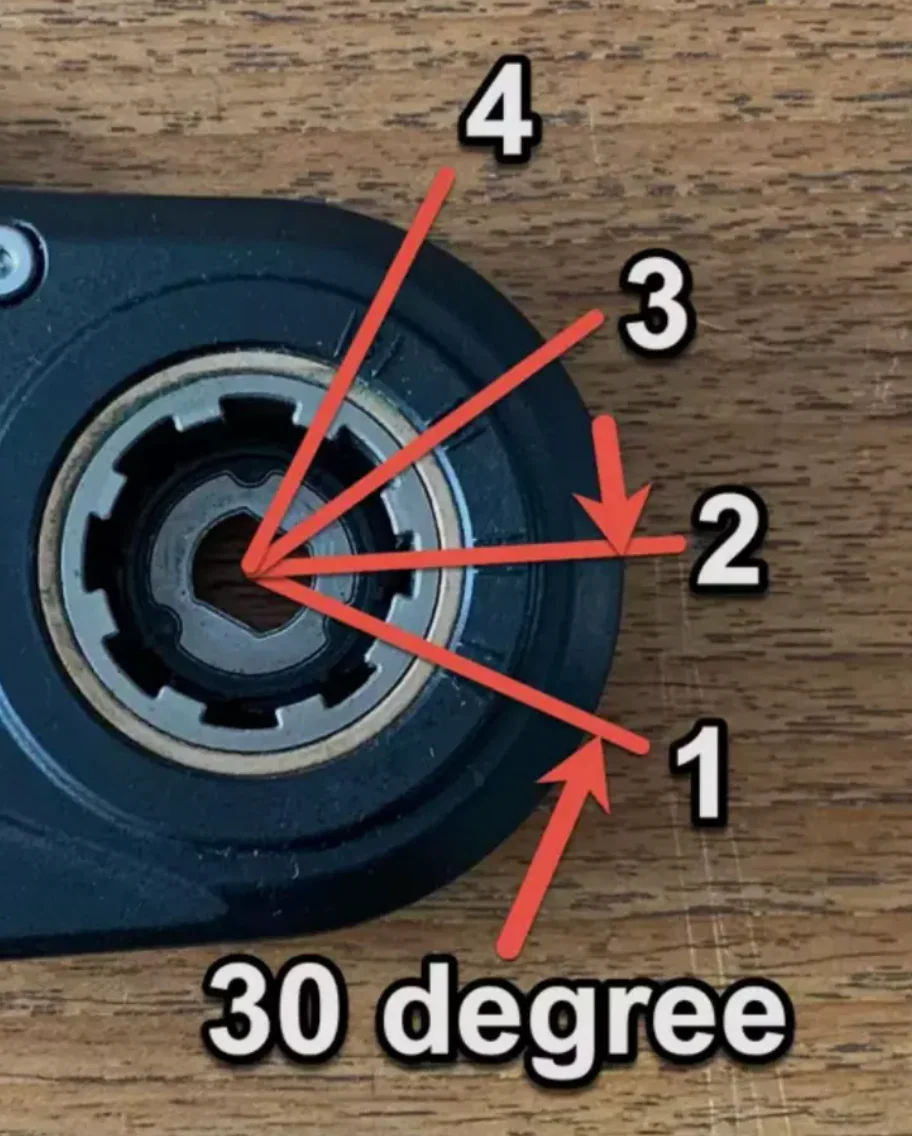
- Check the positioning of the e-Shifter washer before the installation (it should look to 1st Gear, How to fix eShifter washer position).
- Make sure the rear hub is serviced and has no issues.
- Internal lubrication must be electronic friendly.
- PCB board must be protected from water and moisture.
- eShifter motor can be checked by any 3-9v battery